pgAdmin is an open-source software for managing PostgreSQL databases. It features a graphical interface, SQL query tools, code debugger, and other utilities. This guide is based on an Ubuntu 20.04 cloud server and details the installation and usage of phpMyAdmin.
Start by installing the necessary dependencies for pgAdmin.
$ sudo apt-get install curl gnupg2 -yImport the signature key for the pgAdmin software repository.
$ sudo curl https://www.pgadmin.org/static/packages_pgadmin_org.pub | sudo apt-key addAdd the pgAdmin software repository.
$ sudo sh -c 'echo "deb https://ftp.postgresql.org/pub/pgadmin/pgadmin4/apt/$(lsb_release -cs) pgadmin4 main" > /etc/apt/sources.list.d/pgadmin4.list && apt-get update --allow-insecure-repositories'Install pgAdmin.
$ sudo apt install pgadmin4-web -ySet up the web interface by entering an email address and login password.
$ sudo /usr/pgadmin4/bin/setup-web.shAccess the pgAdmin management address, for example: http://192.0.2.48/pgadmin4, and log in using the email address and password provided earlier.
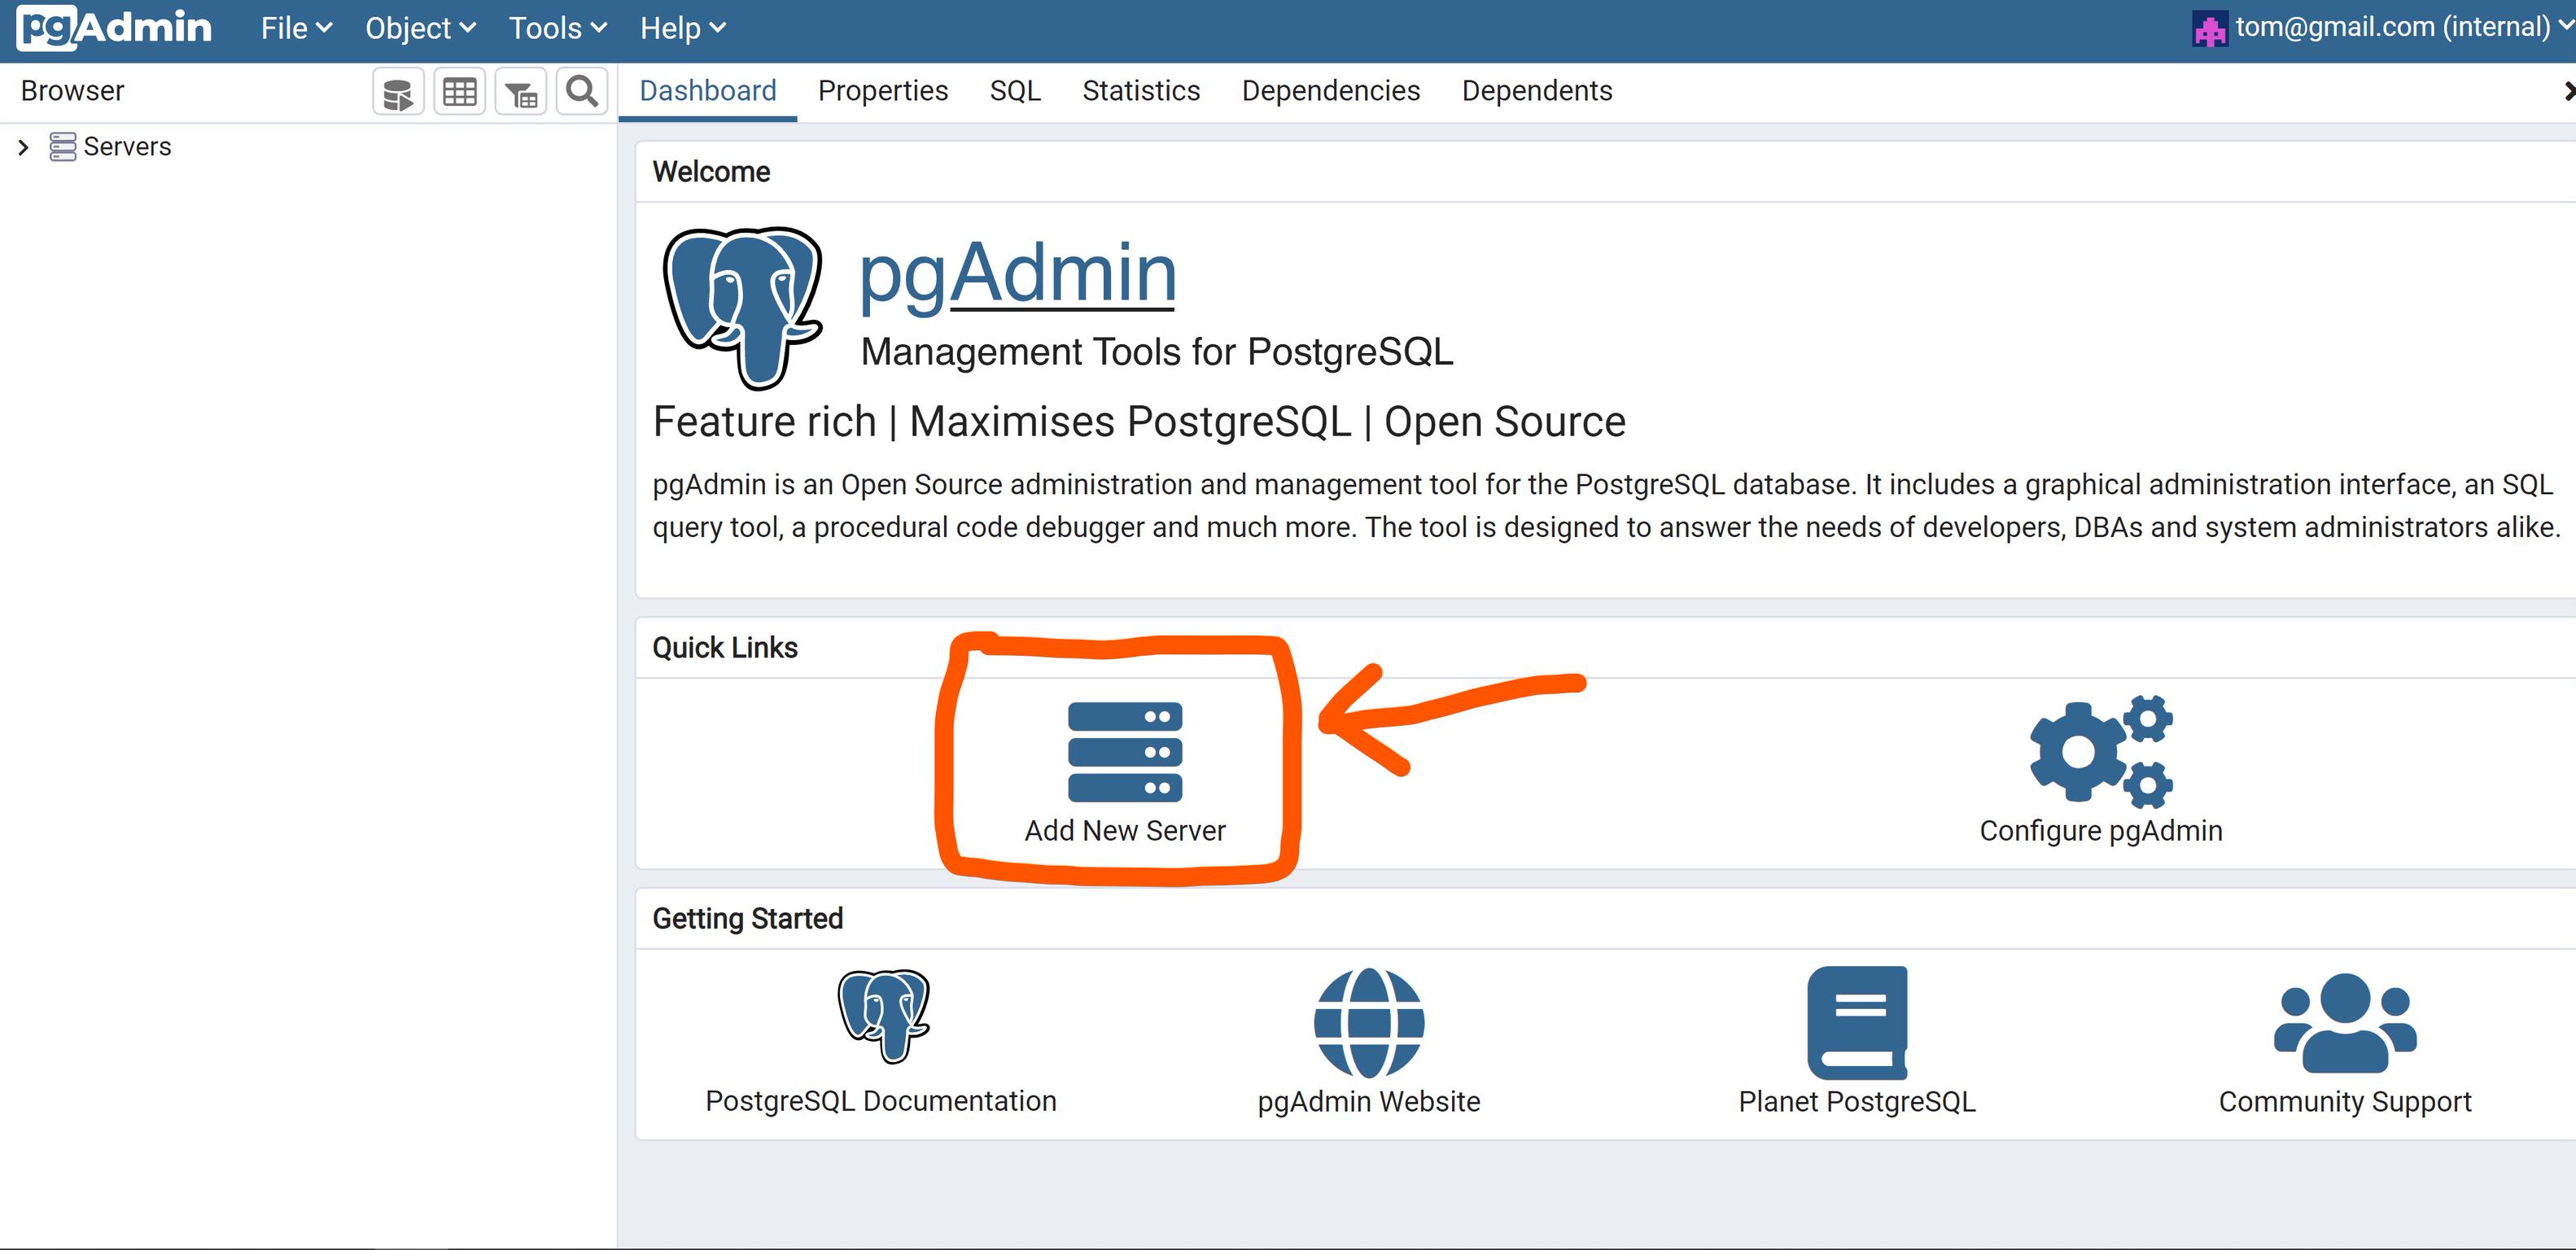
Log in to the pgAdmin management address, go to the Dashboard interface, and click on "Add New Server."

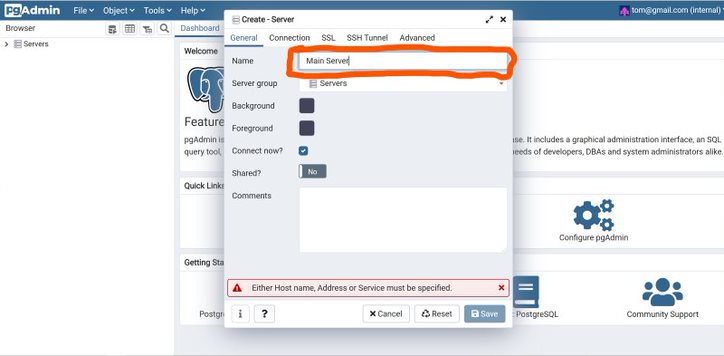
In the pop-up dialog box, enter the server's name in the "Name" field.

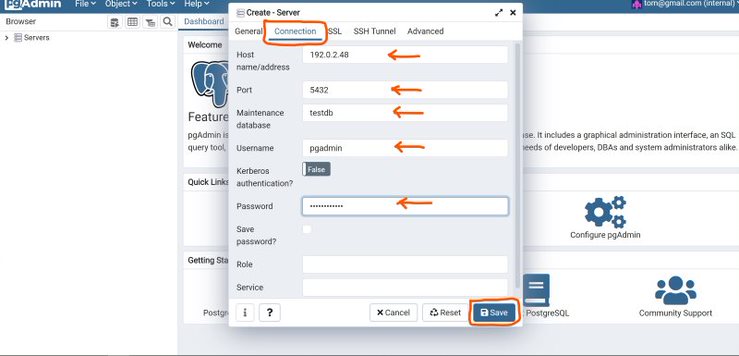
Switch to the "Connection" tab in the pop-up dialog box and enter the database connection information:
Click "Save" to save and log in to pgAdmin.

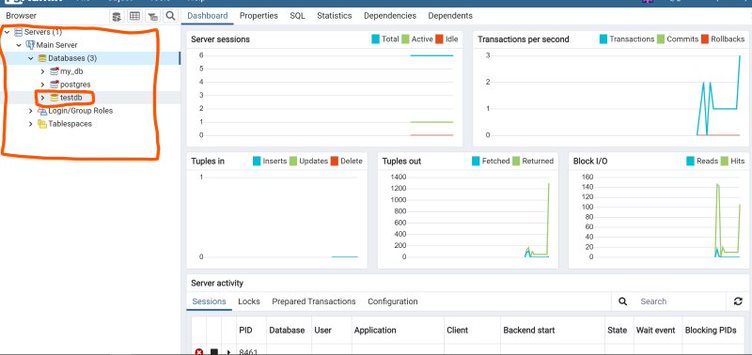
Upon successful login, you will see the previously connected server in the left panel of the dashboard. Expand the arrow, click on the database name.

By following these steps, pgAdmin has been successfully installed on your Ubuntu 20.04 cloud server.
23-02-2024 02:02:07
22-02-2024 03:19:32
22-02-2024 03:16:03
22-02-2024 03:14:03
22-02-2024 03:11:58