The FEMP stack, similar to the LEMP stack in Linux operating systems, is a combination of software used for hosting dynamic websites and applications on the FreeBSD operating system. FEMP stands for FreeBSD, Nginx, MySQL, and PHP. This guide is based on the FreeBSD 12.0 operating system and utilizes the pkg package manager to deploy the FEMP stack.
First, check the version of FreeBSD.
uname -ro
# FreeBSD 12.0-RELEASE-p6
Then, ensure that FreeBSD is updated to the latest version.
freebsd-update fetch install
pkg update && pkg upgrade -y
Next, install the necessary system software.
pkg install -y sudo vim bash curlSet the time zone.
sudo tzsetupCreate a new user; for this example, we will use 'zhaomu' as the username.
adduser

# Username: zhaomu
# Full name: zhaomu.com
# Uid (Leave empty for default): <Enter>
# Login group [zhaomu]: <Enter>
# Login group is zhaomu. Invite zhaomu into other groups? []: wheel
# Login class [default]: <Enter>
# Shell (sh csh tcsh nologin) [sh]: bash
# Home directory [/home/zhaomu]: <Enter>
# Home directory permissions (Leave empty for default): <Enter>
# Use password-based authentication? [yes]: <Enter>
# Use an empty password? (yes/no) [no]: <Enter>
# Use a random password? (yes/no) [no]: <Enter>
# Enter password: your_secure_password
# Enter password again: your_secure_password
# Lock out the account after creation? [no]: <Enter>
# OK? (yes/no): yes
# Add another user? (yes/no): no
# Goodbye!
Run the visudo command, remove the comment before the following line, allowing users added to the wheel group to execute any command.
visudo

# %wheel ALL=(ALL) ALL
Switch to the recently created zhaomu user.
su - zhaomuInstall Nginx using the FreeBSD package manager. With FreeBSD's pkg package manager, we can easily install most of the common software maintained by FreeBSD.
Execute the following command to install the latest version of Nginx and start Nginx.
sudo pkg install -y nginx
sudo sysrc nginx_enable=yes
sudo service nginx start
Check the version and status of Nginx.
sudo nginx -v
sudo service nginx status
At this point, accessing the IP address in a browser should display "Welcome to nginx!", indicating a successful Nginx installation.
Similarly, install MySQL using pkg, and start MySQL.
sudo pkg install -y mysql80-client mysql80-server
sudo sysrc mysql_enable=yes
sudo service mysql-server start
Check the version and status of MySQL.
sudo mysql --version
sudo service mysql-server status
As one of the best practices for MySQL, we need to execute the mysql_secure_installation script, which helps to mitigate some of the default security risks of MySQL and sets the permissions for the MySQL database. After running this wizard, the system will prompt us to enter the root password; keep the rest of the options as default.
sudo mysql_secure_installationInstall PHP version 7.3 and enable PHP-FPM.
sudo pkg install -y php73
sudo sysrc php_fpm_enable=yes
sudo service php-fpm start
Check the PHP version and status.
sudo php --version
sudo service php-fpm status
To enhance PHP functionality, we can also install some PHP components. Execute php -m to see the installed components.
php -m
# [PHP Modules]
# Core
# date
# libxml
# mysqlnd
# pcre
# Reflection
# SPL
# standard

# [Zend Modules]
Run the pkg search command to view available PHP components.
pkg search ^php73-*

# Output
# php73-7.3.7                    PHP Scripting Language
# php73-Ice37-3.7.2              Modern alternative to object middleware such as CORBA/COM/DCOM/COM+
# php73-aphpbreakdown-2.2.2      Code-Analyzer for PHP for Compatibility Check-UP
# php73-aphpunit-1.8             Testing framework for unit tests
# php73-bcmath-7.3.7             The bcmath shared extension for php
# php73-brotli-0.7.0             Brotli extension for PHP
# php73-bsdconv-11.5.0           PHP wrapper for bsdconv
# php73-bz2-7.3.7                The bz2 shared extension for php
# php73-calendar-7.3.7           The calendar shared extension for php
# php73-composer-1.8.6           Dependency Manager for PHP
# php73-ctype-7.3.7              The ctype shared extension for php
# php73-curl-7.3.7               The curl shared extension for php
# . . .
To enable Nginx to recognize PHP, some settings need to be configured. First, create a file named test.conf in the Nginx configuration directory.
sudo vim /usr/local/etc/nginx/test.confAdd the following code to the test.conf file.
server {
  listen 80;
  server_name SERVER_IP; # Replace with your IP or hostname
  root /usr/local/www/nginx-dist;
  index index.php index.html index.htm;
  location / {
    try_files $uri $uri/ =404;
  }
  location ~ \.php$ {
    fastcgi_pass 127.0.0.1:9000;
    fastcgi_index index.php;
    fastcgi_param SCRIPT_FILENAME $document_root$fastcgi_script_name;
    include fastcgi_params;
  }
}
Then edit the main Nginx configuration file.
vim /usr/local/etc/nginx/nginx.confIn the nginx.conf file, add the following code to reference the test.conf file.
include test.conf;Reload the Nginx server and check if the settings are effective.
sudo service nginx reload
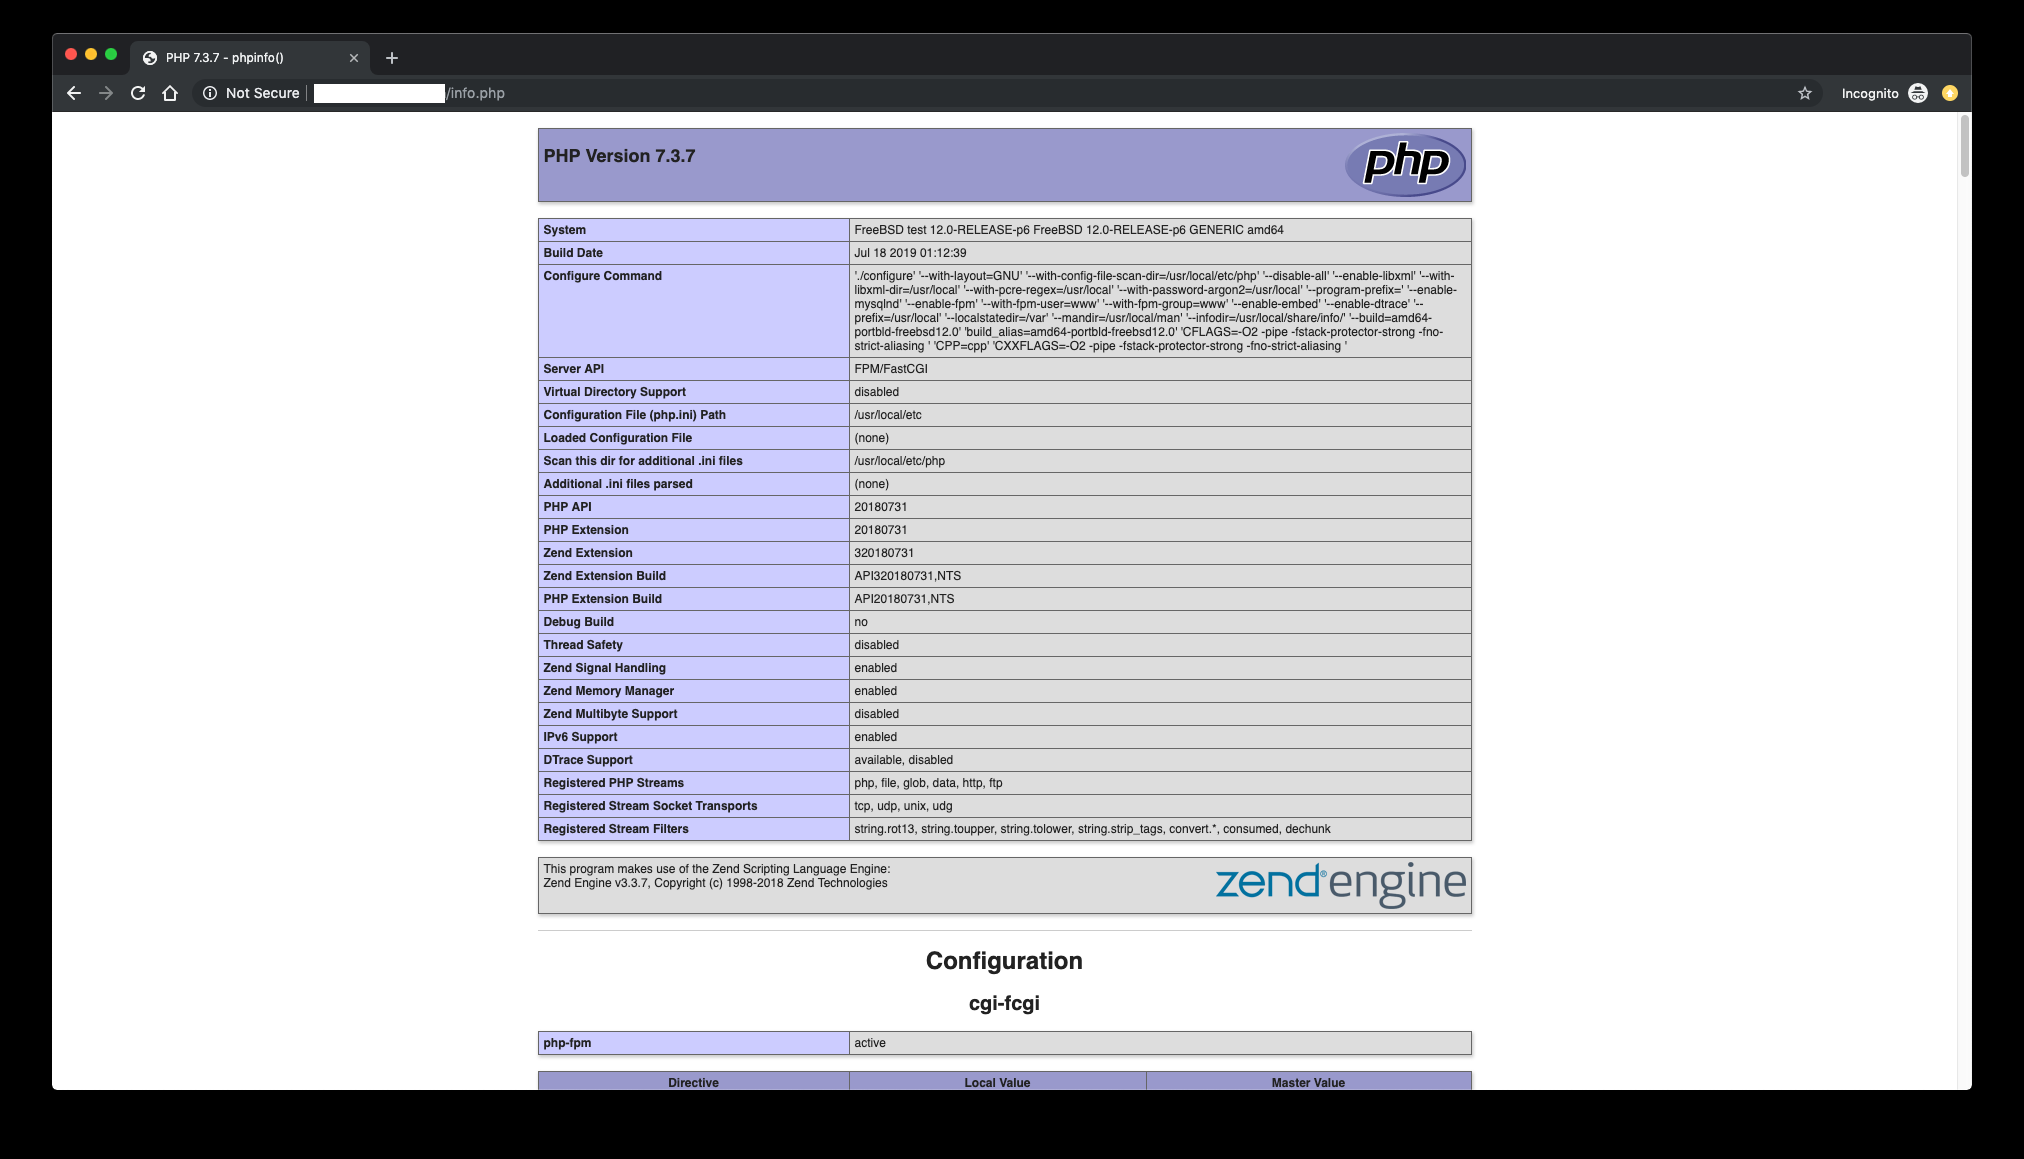
sudo nginx -tTo test whether the FreeBSD system can run PHP correctly, create a simple PHP script named info.php.
sudo vim /usr/local/www/nginx-dist/info.phpAdd the following code
<?php phpinfo(); ?>Then access: http://your_server_IP/info.php. If everything is normal, the following page should appear.

Finally, delete the test script and start the official deployment of applications. With this, the steps to install the FEMP platform on a FreeBSD cloud server are complete.
sudo rm /usr/local/www/nginx-dist/info.php23-02-2024 02:02:07
22-02-2024 03:19:32
22-02-2024 03:16:03
22-02-2024 03:14:03
22-02-2024 03:11:58