In this article, we will learn how to install the LAMP stack, which includes Apache, PHP, and MySQL, on an Ubuntu cloud server. We are using Ubuntu 18.04 for this installation, but the method is applicable to other versions of Ubuntu as well. The installation process is divided into the following steps.
Before starting the installation, we update the operating system to the latest version and restart the cloud server.
sudo apt update -y
sudo apt upgrade -y
reboot
Install Apache using the following command:
sudo apt-get install apache2 -yCheck Apache's version with this command:
apache2 -vThe displayed result will be as follows:
Server version: Apache/2.4.29 (Ubuntu)
Server built:   2019-12-03T15:55:03
Additionally, set Apache to start automatically with the system:
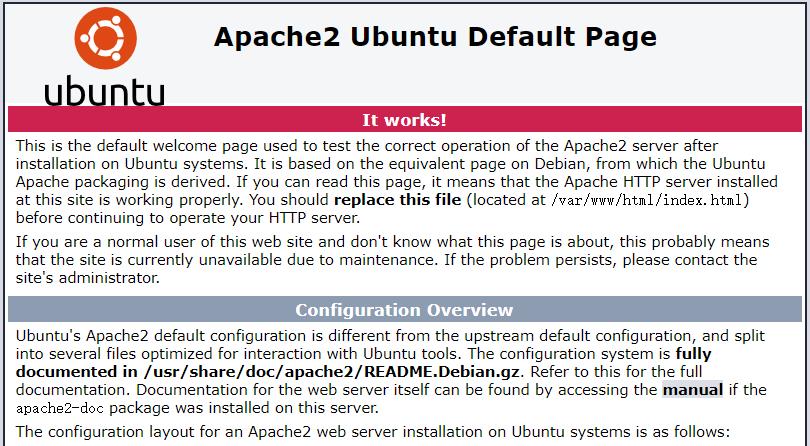
sudo systemctl enable apache2.serviceIf the Apache default page appears when accessing the cloud server's IP address http://IPAddress in a browser, it indicates that Apache has been successfully installed.

Install PHP using the following command:
sudo apt-get install php -yNext, install the necessary PHP extensions:
sudo apt-get install php-{bcmath,bz2,intl,gd,mbstring,mysql,fpm} -yCheck PHP's version with this command:
php -vThe displayed result will be as follows:
PHP 7.2.24-0ubuntu0.18.04.3 (cli) (built: Feb 11 2020 15:55:52) ( NTS )
Copyright (c) 1997-2018 The PHP Group
Zend Engine v3.2.0, Copyright (c) 1998-2018 Zend Technologies
    with Zend OPcache v7.2.24-0ubuntu0.18.04.3, Copyright (c) 1999-2018, by Zend Technologies
View the installed PHP modules with this command:
php -mThe displayed result will be as follows:
[PHP Modules]
bcmath
bz2
calendar
Core
ctype
date
exif
fileinfo
filter
ftp
gd
gettext
hash
iconv
intl
json
libxml
mbstring
mysqli
mysqlnd
openssl
pcntl
pcre
PDO
pdo_mysql
Phar
posix
readline
Reflection
session
shmop
sockets
sodium
SPL
standard
sysvmsg
sysvsem
sysvshm
tokenizer
Zend OPcache
zip
zlib

[Zend Modules]
Zend OPcache
Install MySQL using the following command:
sudo apt-get install mysql-server -yCheck MySQL's version with this command:
mysql -VThe displayed result will be as follows:
mysql Ver 14.14 Distrib 5.7.29, for Linux (x86_64) using EditLine wrapperThen, run the MySQL installation setup wizard:
sudo mysql_secure_installationDuring the MySQL installation setup wizard, you will need to enter the root password and answer some security-related questions. Usually, it's sufficient to select the default values provided by the wizard.
Securing the MySQL server deployment.
Connecting to MySQL using a blank password.
VALIDATE PASSWORD PLUGIN can be used to test passwords and improve security. It checks the strength of password and allows the users to set only those passwords which are secure enough. Would you like to setup VALIDATE PASSWORD plugin?
Press y|Y for Yes, any other key for No: Y
There are three levels of password validation policy:
LOW    Length >= 8
MEDIUM Length >= 8, numeric, mixed case, and special characters
STRONG Length >= 8, numeric, mixed case, special characters and dictionary file
Please enter 0 = LOW, 1 = MEDIUM and 2 = STRONG: 2
Please set the password for root here.
New password:
Re-enter new password:
Estimated strength of the password: 100
Do you wish to continue with the password provided?(Press y|Y for Yes, any other key for No) : Y
By default, a MySQL installation has an anonymous user, allowing anyone to log into MySQL without having to have a user account created for them. This is intended only for testing, and to make the installation go a bit smoother. You should remove them before moving into a production
environment.
Remove anonymous users? (Press y|Y for Yes, any other key for No) : Y
Success.
Normally, root should only be allowed to connect from 'localhost'. This ensures that someone cannot guess at the root password from the network.
Disallow root login remotely? (Press y|Y for Yes, any other key for No) : Y
Success.
By default, MySQL comes with a database named 'test' that anyone can access. This is also intended only for testing, and should be removed before moving into a production environment.
Remove test database and access to it? (Press y|Y for Yes, any other key for No) : Y
 - Dropping test database...
Success.
 - Removing privileges on test database...
Success.
Reloading the privilege tables will ensure that all changes made so far will take effect immediately.
Reload privilege tables now? (Press y|Y for Yes, any other key for No) : Y
Success.
All done!
Also, set MySQL to start automatically with the system:
sudo systemctl enable mysql.serviceBy default, the Ubuntu firewall UFW is disabled. We need to enable UFW and allow access to SSH and Apache-related ports.
sudo ufw allow OpenSSH
sudo ufw allow in "Apache Full"
sudo ufw enable
This concludes our tutorial on installing Apache, PHP, and MySQL on an Ubuntu cloud server.
23-02-2024 02:02:07
22-02-2024 03:19:32
22-02-2024 03:16:03
22-02-2024 03:14:03
22-02-2024 03:11:58