Have you ever encountered this awkward situation where the cloud server's system crashes, and worse, the data inside is crucial and hasn't been backed up? In such cases, are you left with no choice but to brace for customer complaints or to be fired by your boss? Not necessarily! There are still ways to retrieve the data. Before introducing the methods of data retrieval, I strongly recommend that you regularly back up your cloud server using the following methods, so you won't be caught off guard in the future.
Now, let's get to the point. Using a U.S. cloud server as an example, I will guide you step by step on how to extract data from a cloud server.
1.Log in to the management center, navigate to Business Management => Cloud Server Management => Click on the specific cloud server => Mount the ISO named "Finnix." Finnix is a small Linux distribution suitable for emergency rescue mode (Rescue Mode) of operating systems.
2.Wait for the ISO to be successfully mounted. The mounting time depends on the size of the ISO file and network conditions. After successful mounting, the cloud server will automatically reboot, and you can monitor the mounting status of the ISO through the "Console."
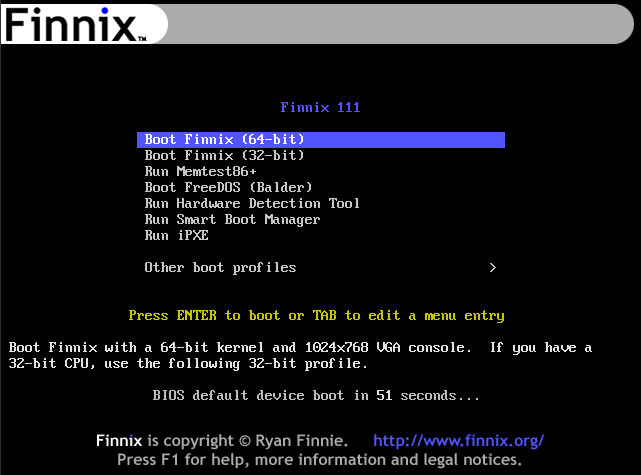
3.Open the console. If the console is temporarily unavailable, it may be because the cloud server is in the process of rebooting. Please wait 10 seconds and try again. Once the Finnix main interface appears, select the first option "Boot Finnix (64-bit)." You need to act within 60 seconds, otherwise, the cloud server will boot from the old hard disk. If you don't act in time, reboot, wait 10 seconds, reopen the console, and you should see the Finnix main interface.
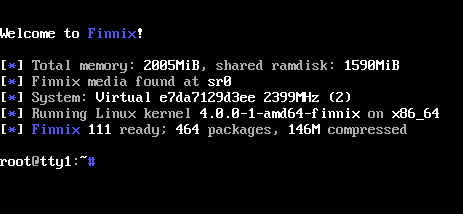
4.Once you see the prompt root@tty1:~#, it indicates that Finnix has finished loading.
5.Next, enter the following commands to change the root password of the Finnix system and enable SSH connections. Remember the password you just set.
passwd
service ssh start
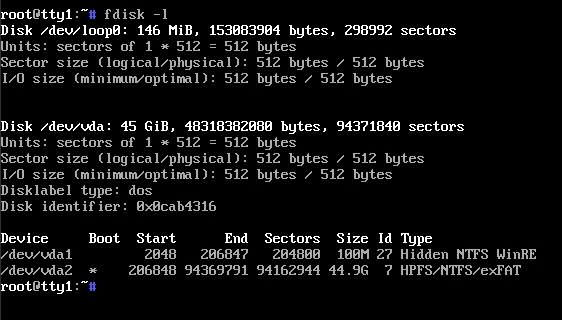
6.Identify the disk to mount. Use the fdisk -l command to view the current list of hard disks and confirm the device name of the disk you want to recover. For instance, /dev/vda1 is the device where the Finnix system is located, and the device we want to recover is /dev/vda2.
7.Scan the disk for errors to ensure the data is not damaged.
If your cloud server runs a Linux operating system, enter the following command for disk scanning.
fsck -y /dev/vda2If your cloud server runs a Windows operating system, enter the following command for disk scanning.
ntfsfix /dev/vda28.Then, enter the following command to mount the hard disk.
mount /dev/vda2 /mnt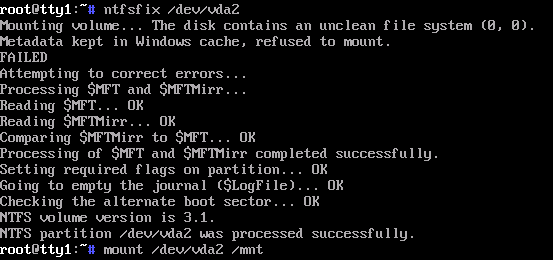
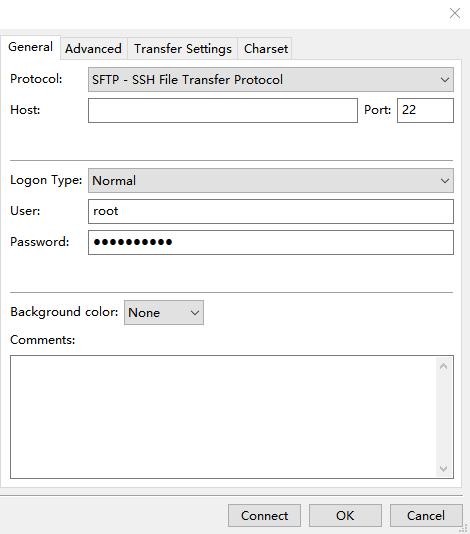
9.Now, you can use FTP software to download the data to your local computer. Using Filezilla as an example, create a new site with SFTP protocol, and fill in the Host, Port, User, and Password fields
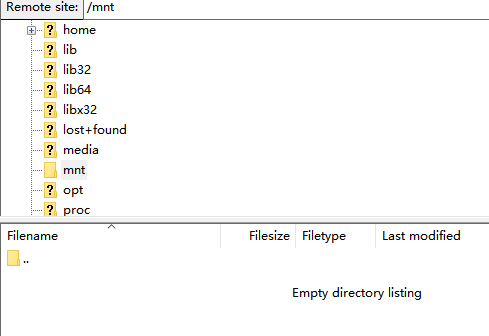
10.The disk you want to recover is under the /mnt directory. Locate the files you want to recover and start downloading the data to your local computer.
Finally, after the data download is complete, you can remove the ISO, reboot the cloud server, and proceed with reinstallation or other operations. The above steps utilize Finnix and SFTP tools to retrieve data from a crashed cloud server system. Although there are several steps, the process is relatively simple.
23-02-2024 02:02:07
22-02-2024 03:19:32
22-02-2024 03:16:03
22-02-2024 03:14:03
22-02-2024 03:11:58