When a cloud server is activated, a single IP address is typically provided free of charge. Cloud servers in most countries and available zones offered by Chaomo Data support multiple IP addresses. Due to differences in underlying architecture, some zones require manual configuration of these additional IP addresses in the operating system. This article uses the Windows operating system as an example to explain the procedure for setting up multiple IPv4 addresses. The process for setting up IPv6 addresses is similar.
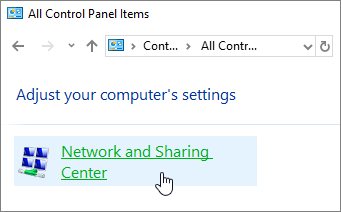
1.Access the Control Panel and open the Network and Sharing Center.

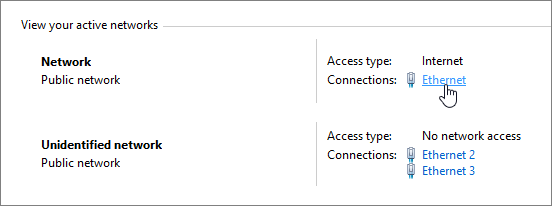
2.Click on the "Ethernet" connection to open the network properties dialog box, then click the "Properties" button.


3.Select "Internet Protocol Version 4," and then click the "Properties" button.

4.Click on "Use the following IP address" and then enter the IP address, subnet mask, default gateway, and DNS server. Here, you enter the primary IP address.

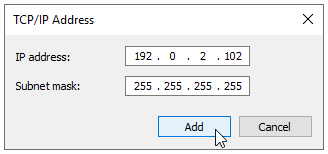
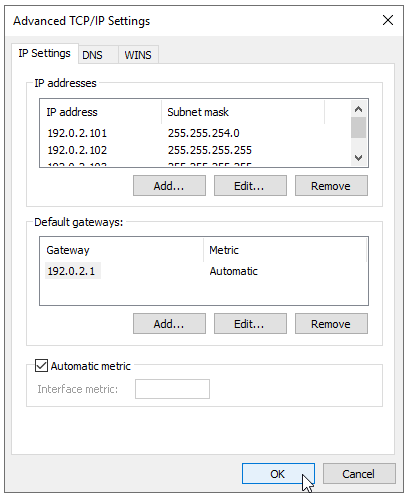
5.Click the "Advanced" button, then click "Add" to fill in the additional IP addresses and subnet masks. Click "Add" again and repeat this step to add more IP addresses.


6.Finally, review all the added IP addresses. If everything is correct, click the "OK" button, and then click "OK" again. This completes the setup of multiple IPv4 addresses.

23-02-2024 02:02:07
22-02-2024 03:19:32
22-02-2024 03:16:03
22-02-2024 03:14:03
22-02-2024 03:11:58